Getting Started with IPEVO
IPEVO Visualizer
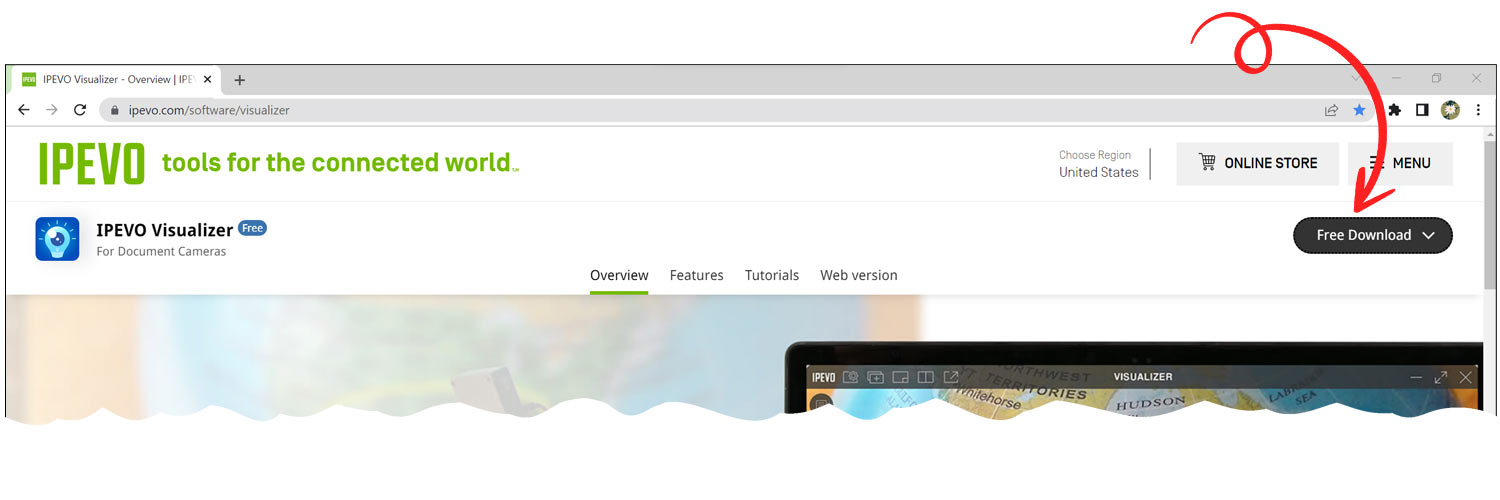
- Download IPEVO Visualizer.
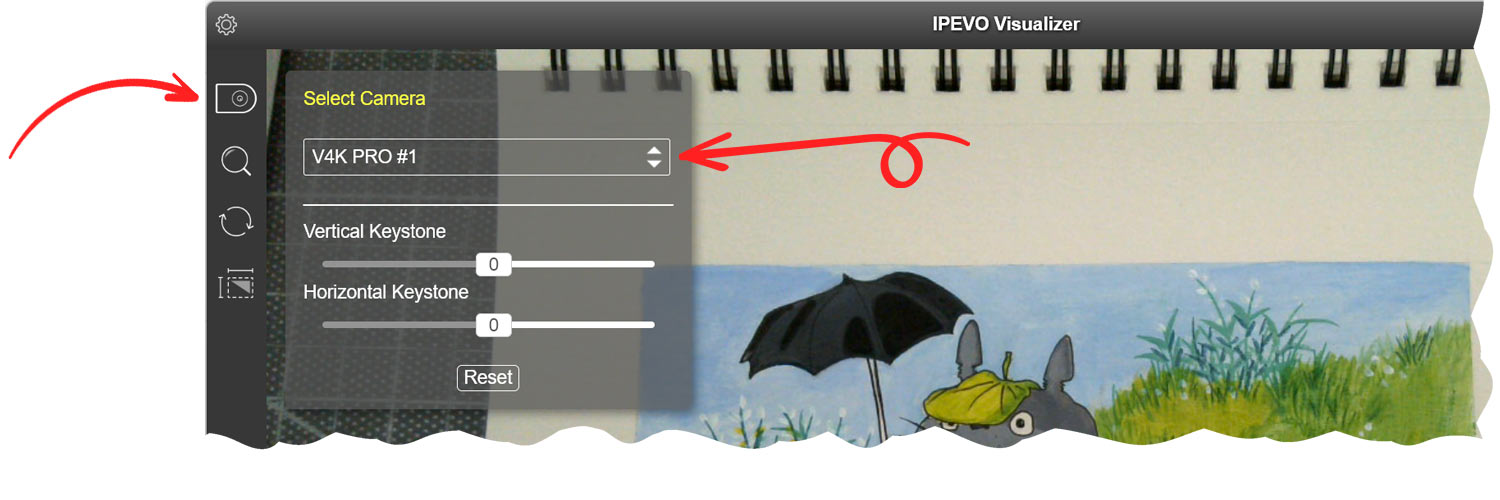
- Click on the first option: “Select Camera”. A dropdown menu will appear, select your document camera.
And you're done! You are now ready to explore all the possibilities with your IPEVO document camera! For more tips on how to use your document camera with Visualizer, visit IPEVO Visualizer for more information.
Google Meet
After logging in to your Google account and plugging in your document camera's USB to your computer, go to https://meet.google.com/ to get started!
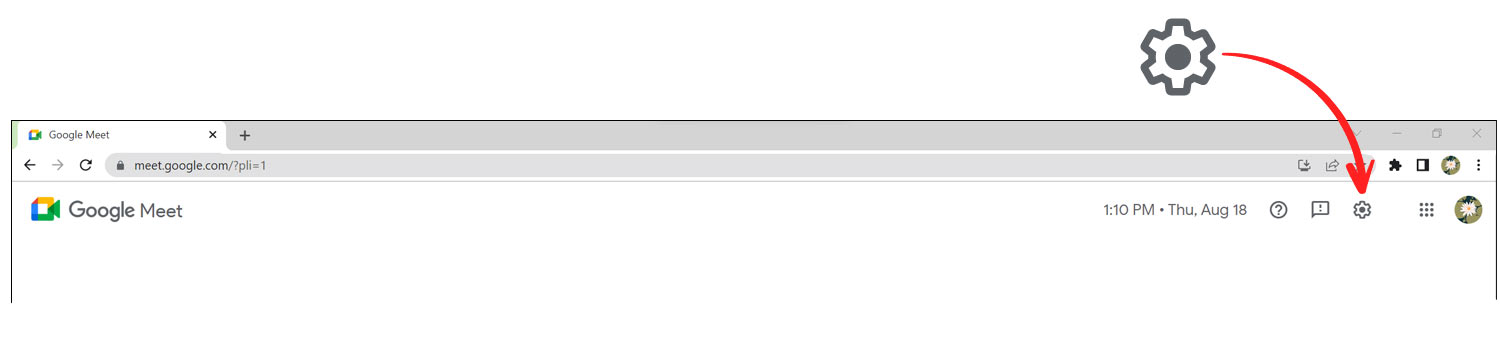
- Select the “Settings” icon at the top right corner.
- In settings, select the Video tab. Switch to your IPEVO document camera.

And you're all set! Now you can easily share your materials while in an online meeting!
Google Meet Audio - Optional: Built-in Microphone
If you have a V4K, V4K PRO, VZ-R or VZ-X, your document camera can also act as a microphone.
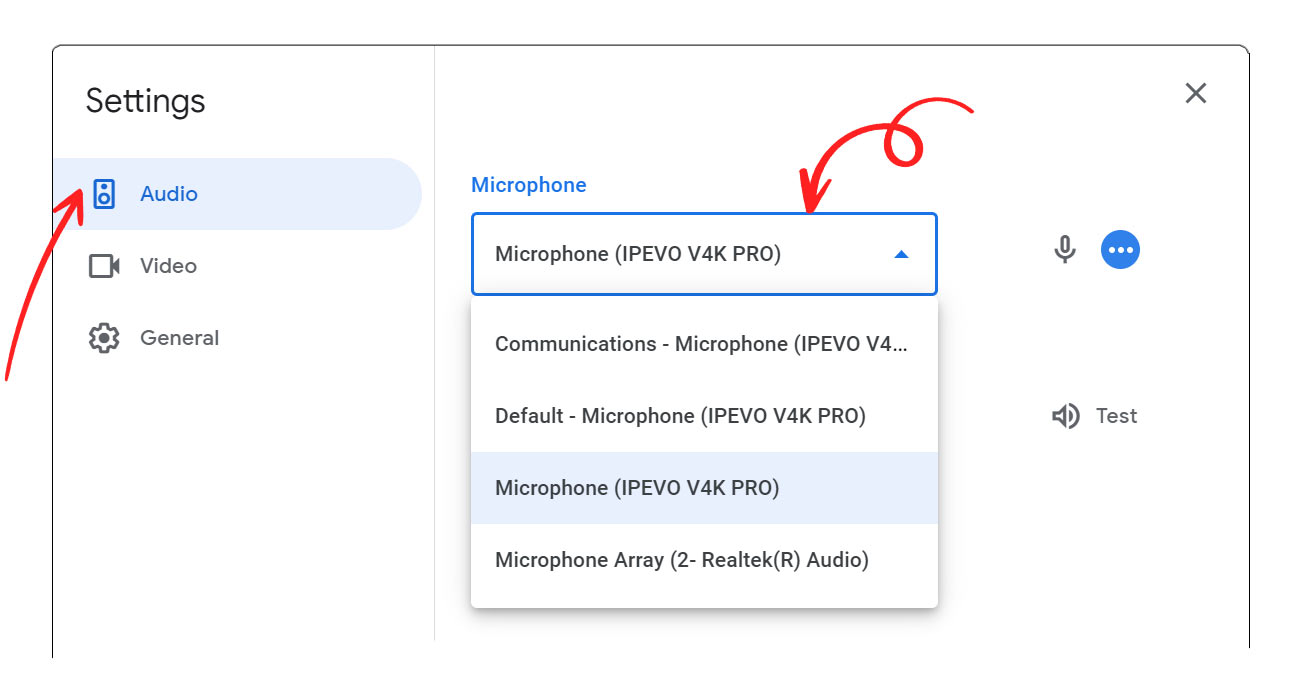
- In Settings, select the Audio tab. In Audio, select your document camera as your source.
Skype
After logging in to your Skype account, plug in your IPEVO document camera's USB to your computer to get started!
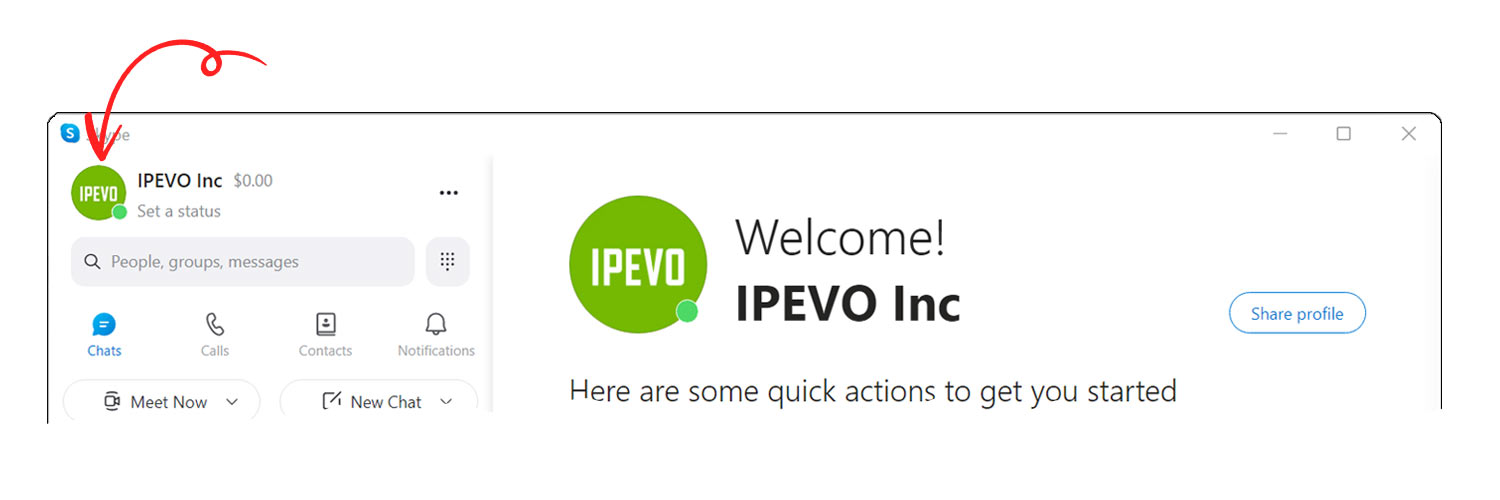
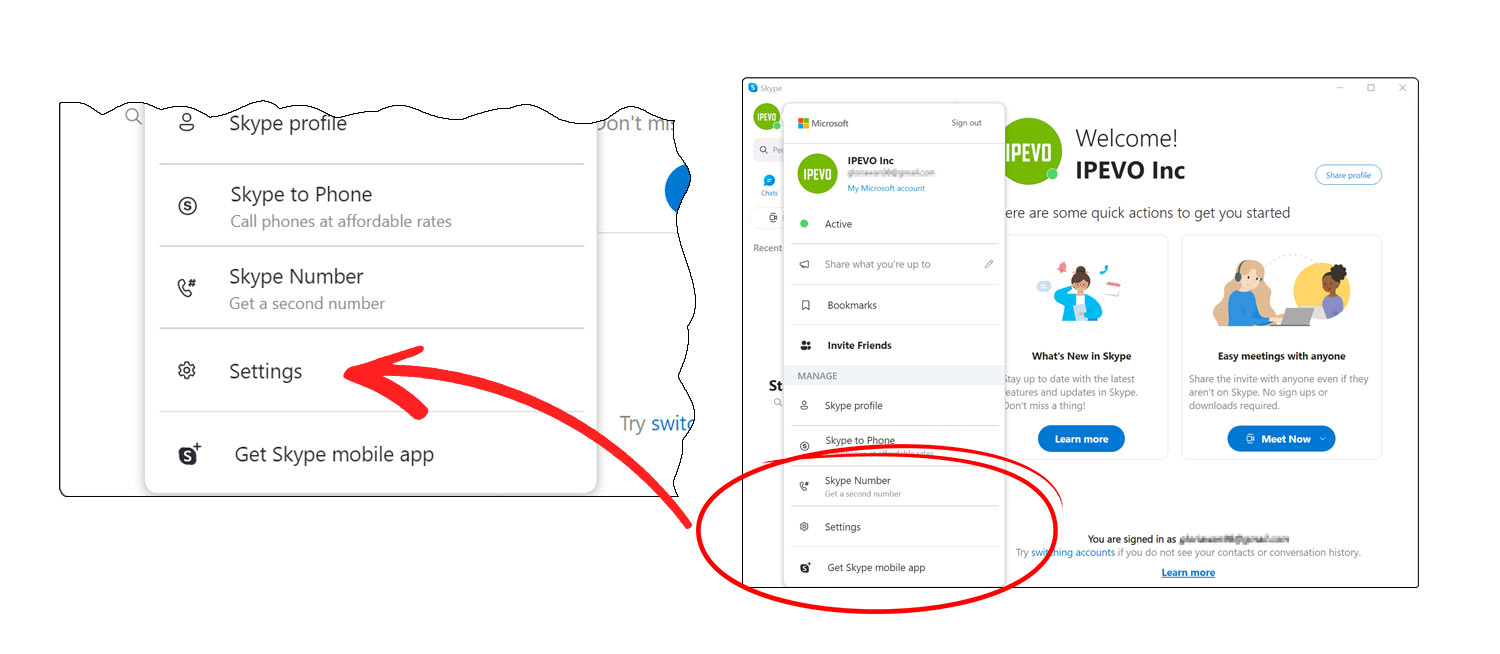
- Select your profile picture on the top left.
- Select Settings.
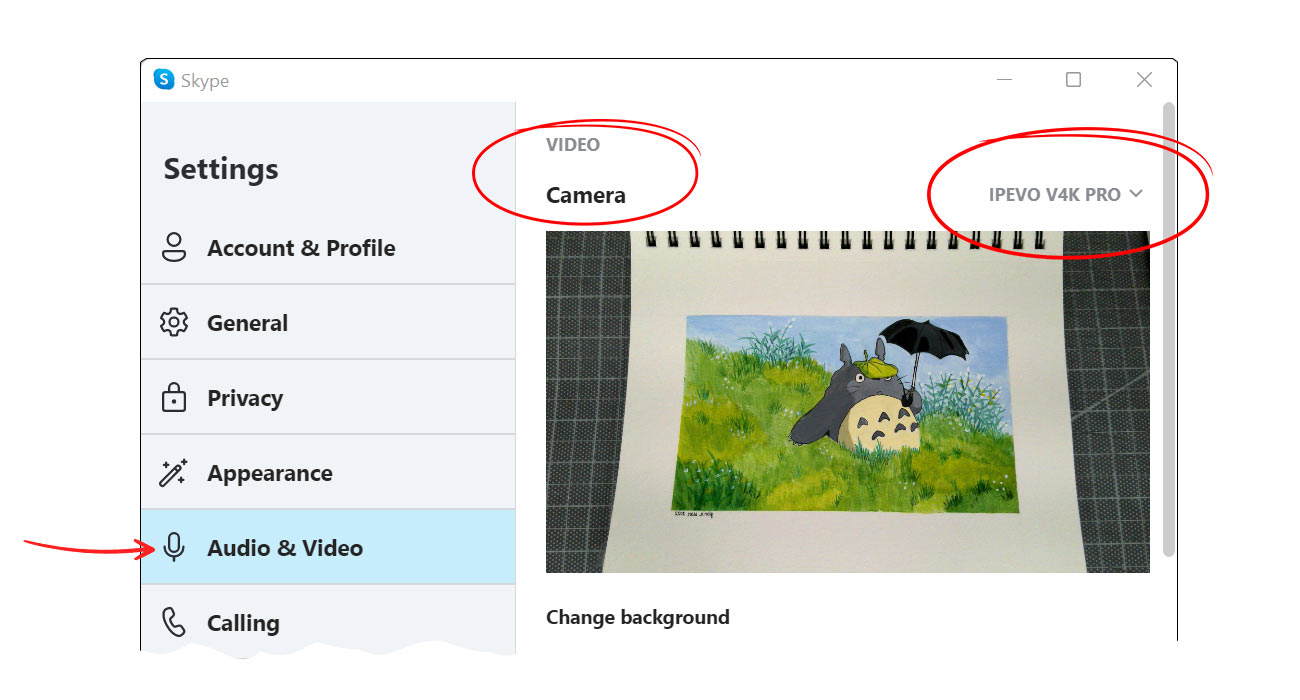
- Select Audio & Video and switch to your document camera.
And you're all set! Now you can easily share your materials while in an online meeting!
Skype Audio - Optional: Built-in Microphone
If you have a V4K, V4K PRO, VZ-R or VZ-X, your document camera can also act as a microphone.
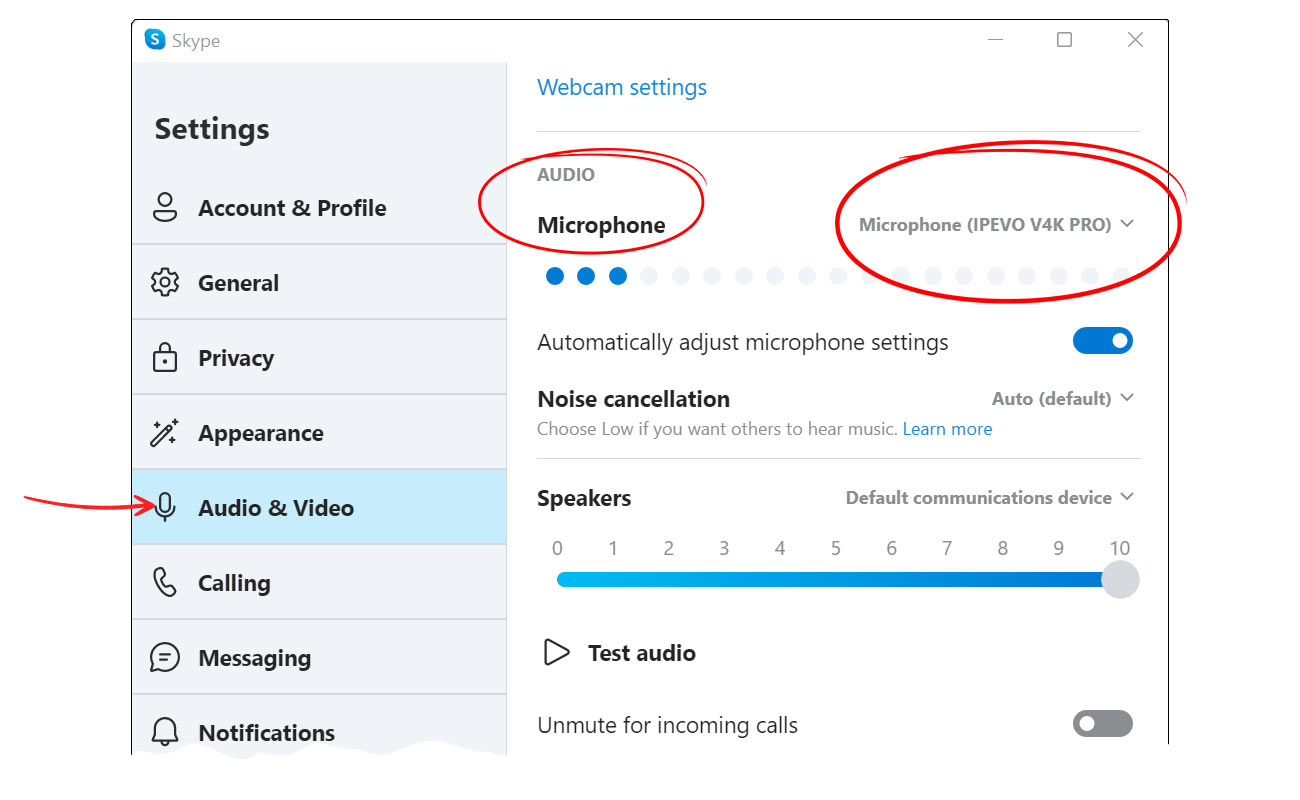
- In Settings, select the Audio & Video tab. Scroll down to Microphone and select your document camera as your source.
Microsoft Teams
After logging into your Microsoft Teams account, plug in your document camera’s USB to your computer to get started!
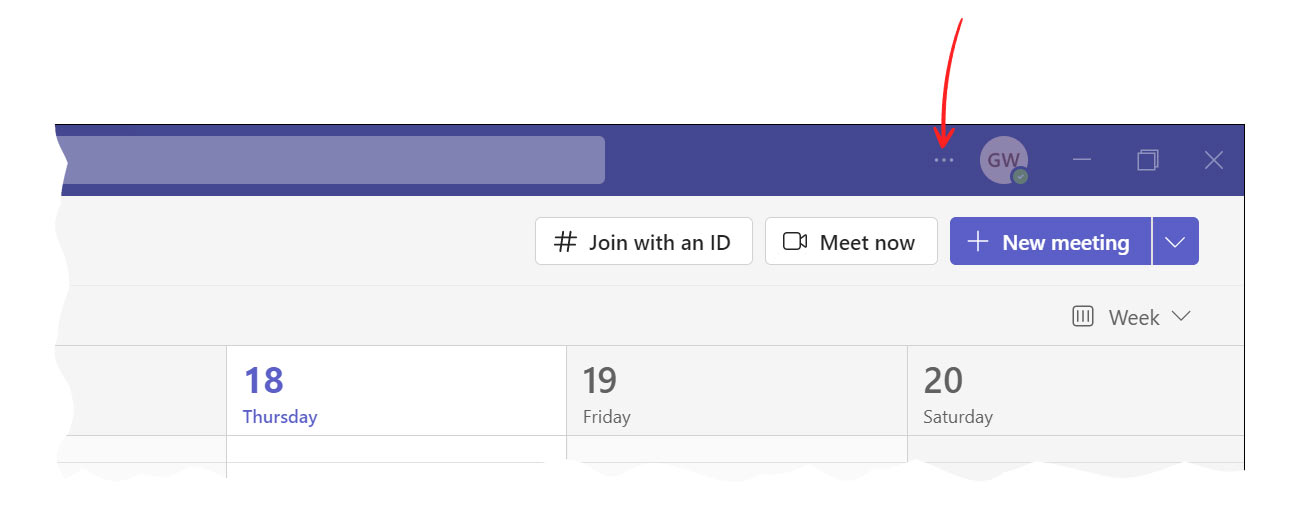
- Select the three dots next to your profile picture on the top right.
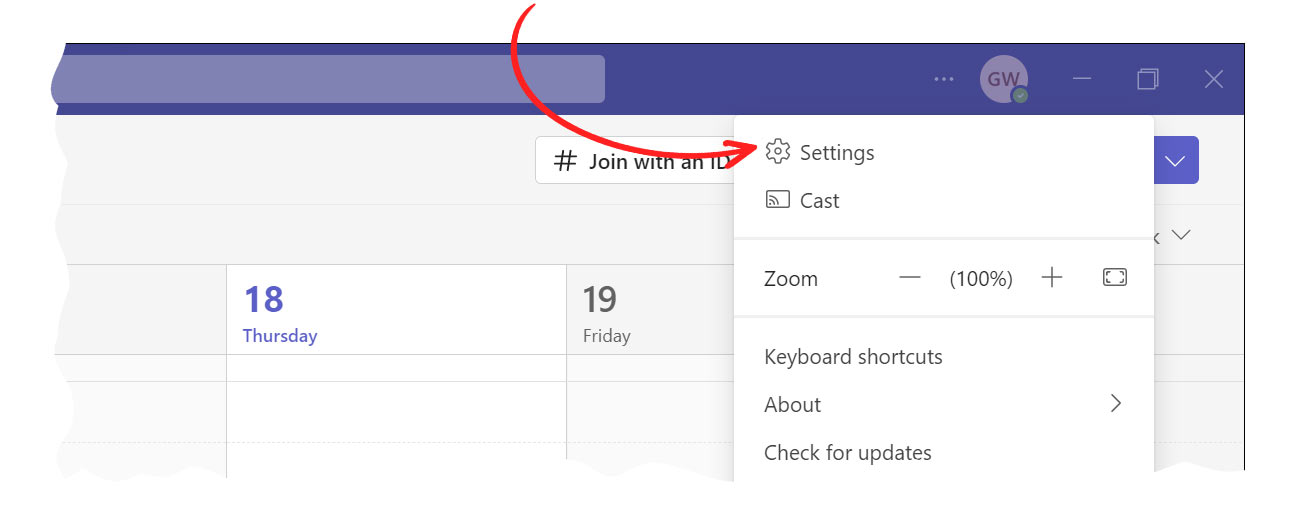
- Select Settings.
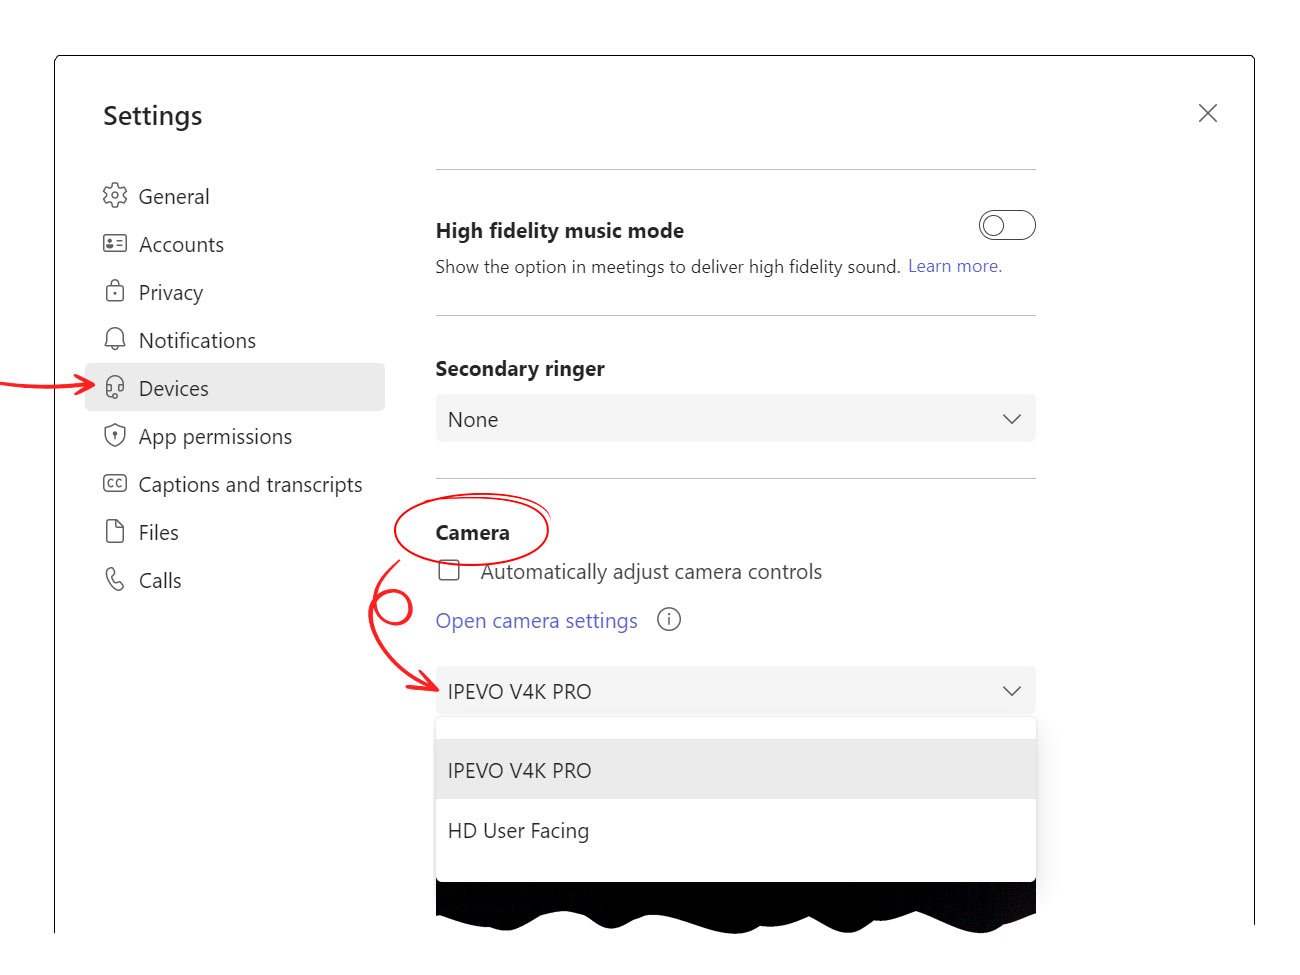
- In settings, select the Devices tab. Under Camera, select your IPEVO document camera as your video source.
And you're all set! Now you can easily share your materials while in an online meeting!
Microsoft Teams Audio - Optional: Built-in Microphone
If you have a V4K, V4K PRO, VZ-R or VZ-X, your document camera can also act as a microphone.
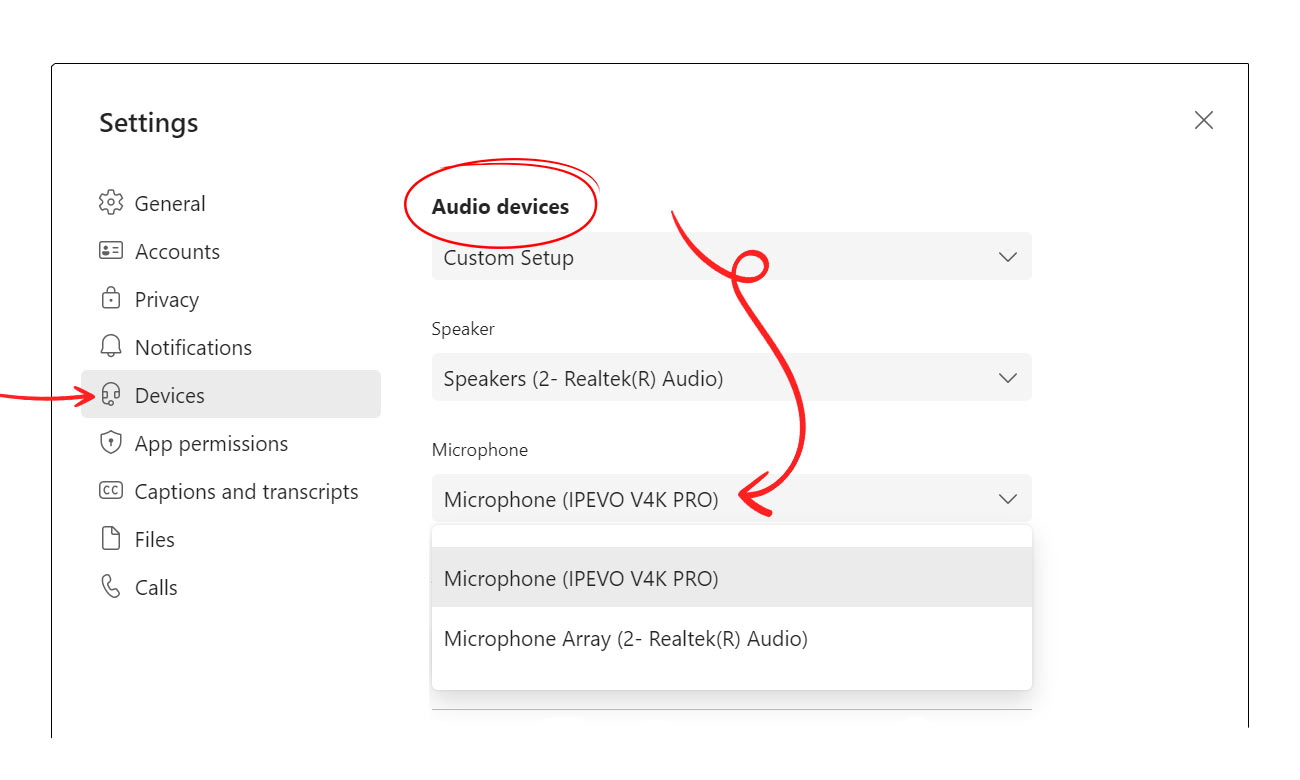
- In Settings, select the Devices tab. Under Audio devices, select your document camera as you source.
- Video instructions: https://youtu.be/_r3T9xX3xI8
Zoom
After logging in to your Zoom account, plug in your IPEVO document camera to your computer to get started!
- Find the Settings icon at the top right corner.
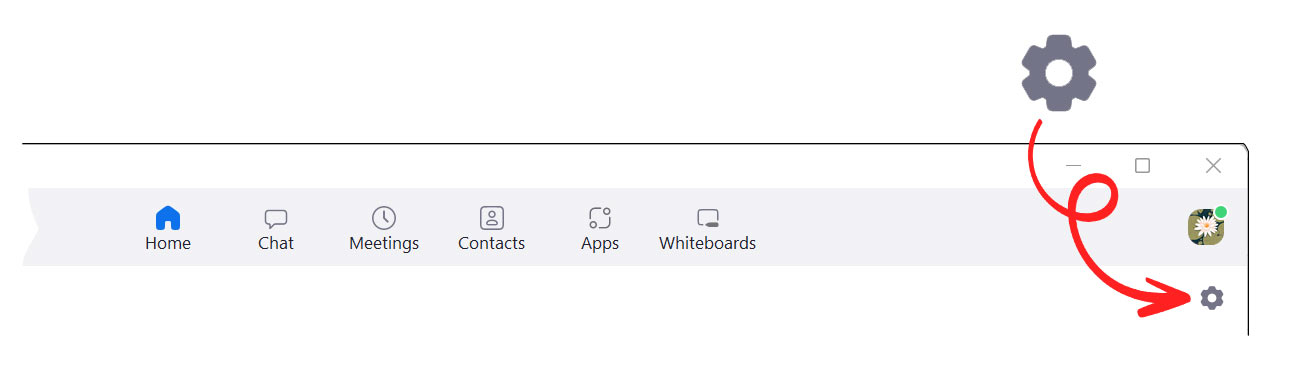
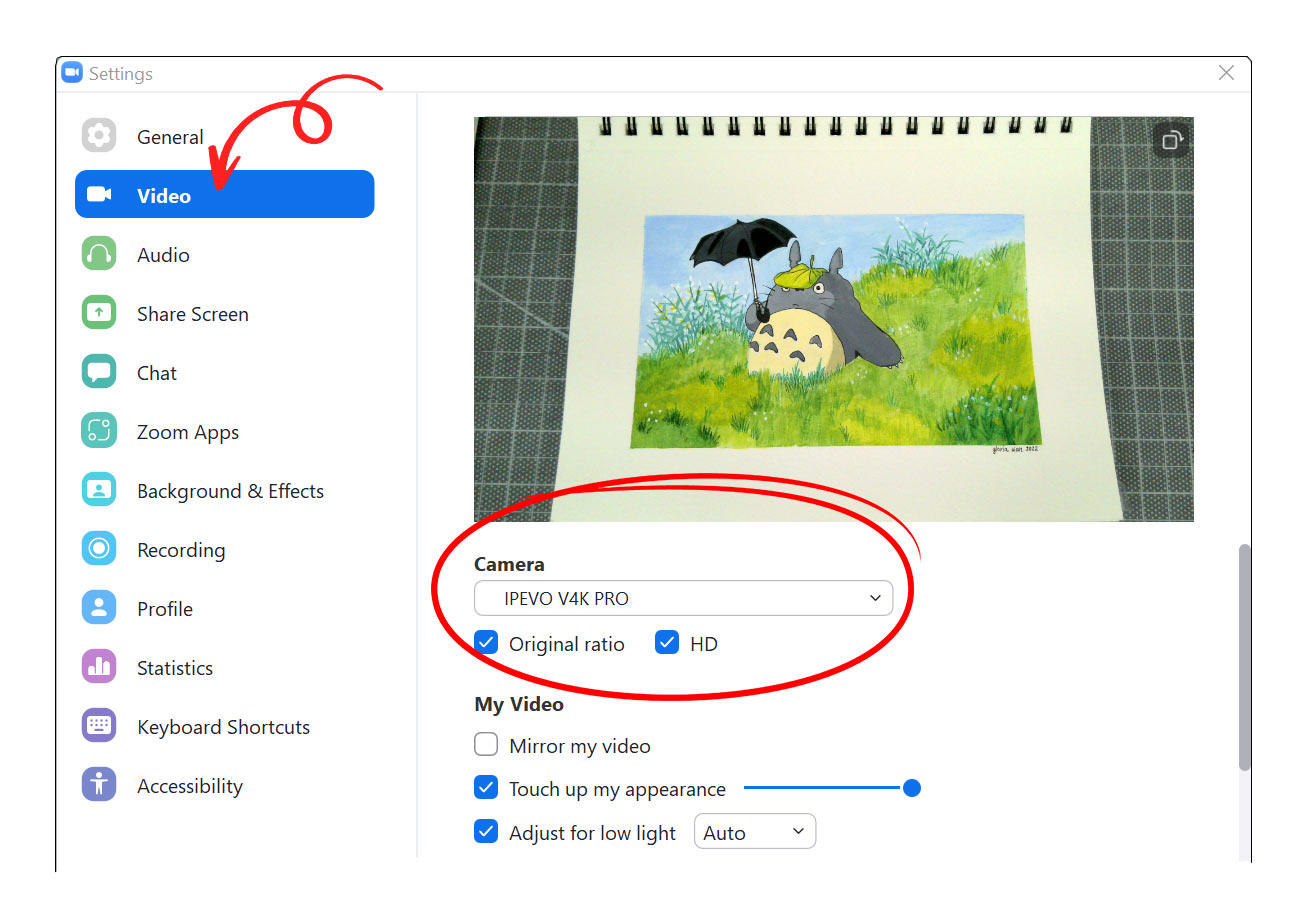
- In Settings, select the Video tab and switch to your document camera.
And you're all set! Now you can easily share your materials while in an online meeting!
Zoom Audio - Optional: Built-in Microphone
If you have a V4K, V4K PRO, VZ-R or VZ-X, your document camera can also act as a microphone.
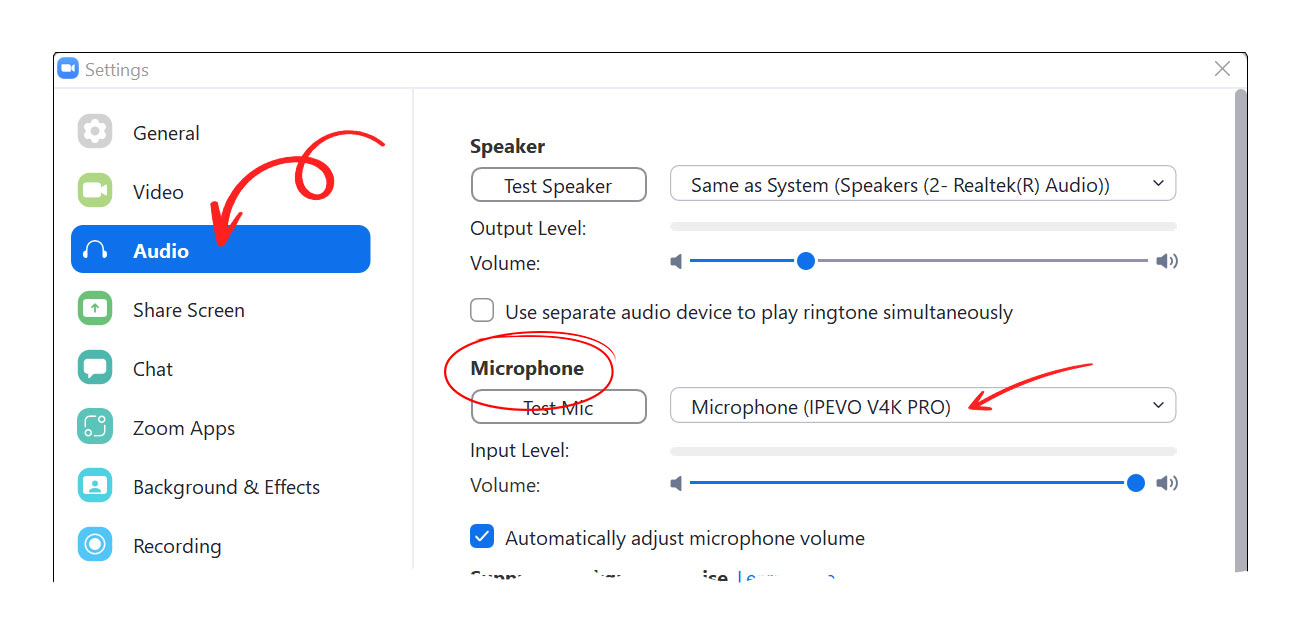
- Open Settings and select the Audio tab. Under Microphone, select your document camera as your source.
Using Visualizer with Zoom
- Download and run IPEVO Visualizer. Then, open or join a new meeting in Zoom.
- Select the "Share Screen" option on the bottom bar. On the window that pops up, select the “Visualizer” window to share.
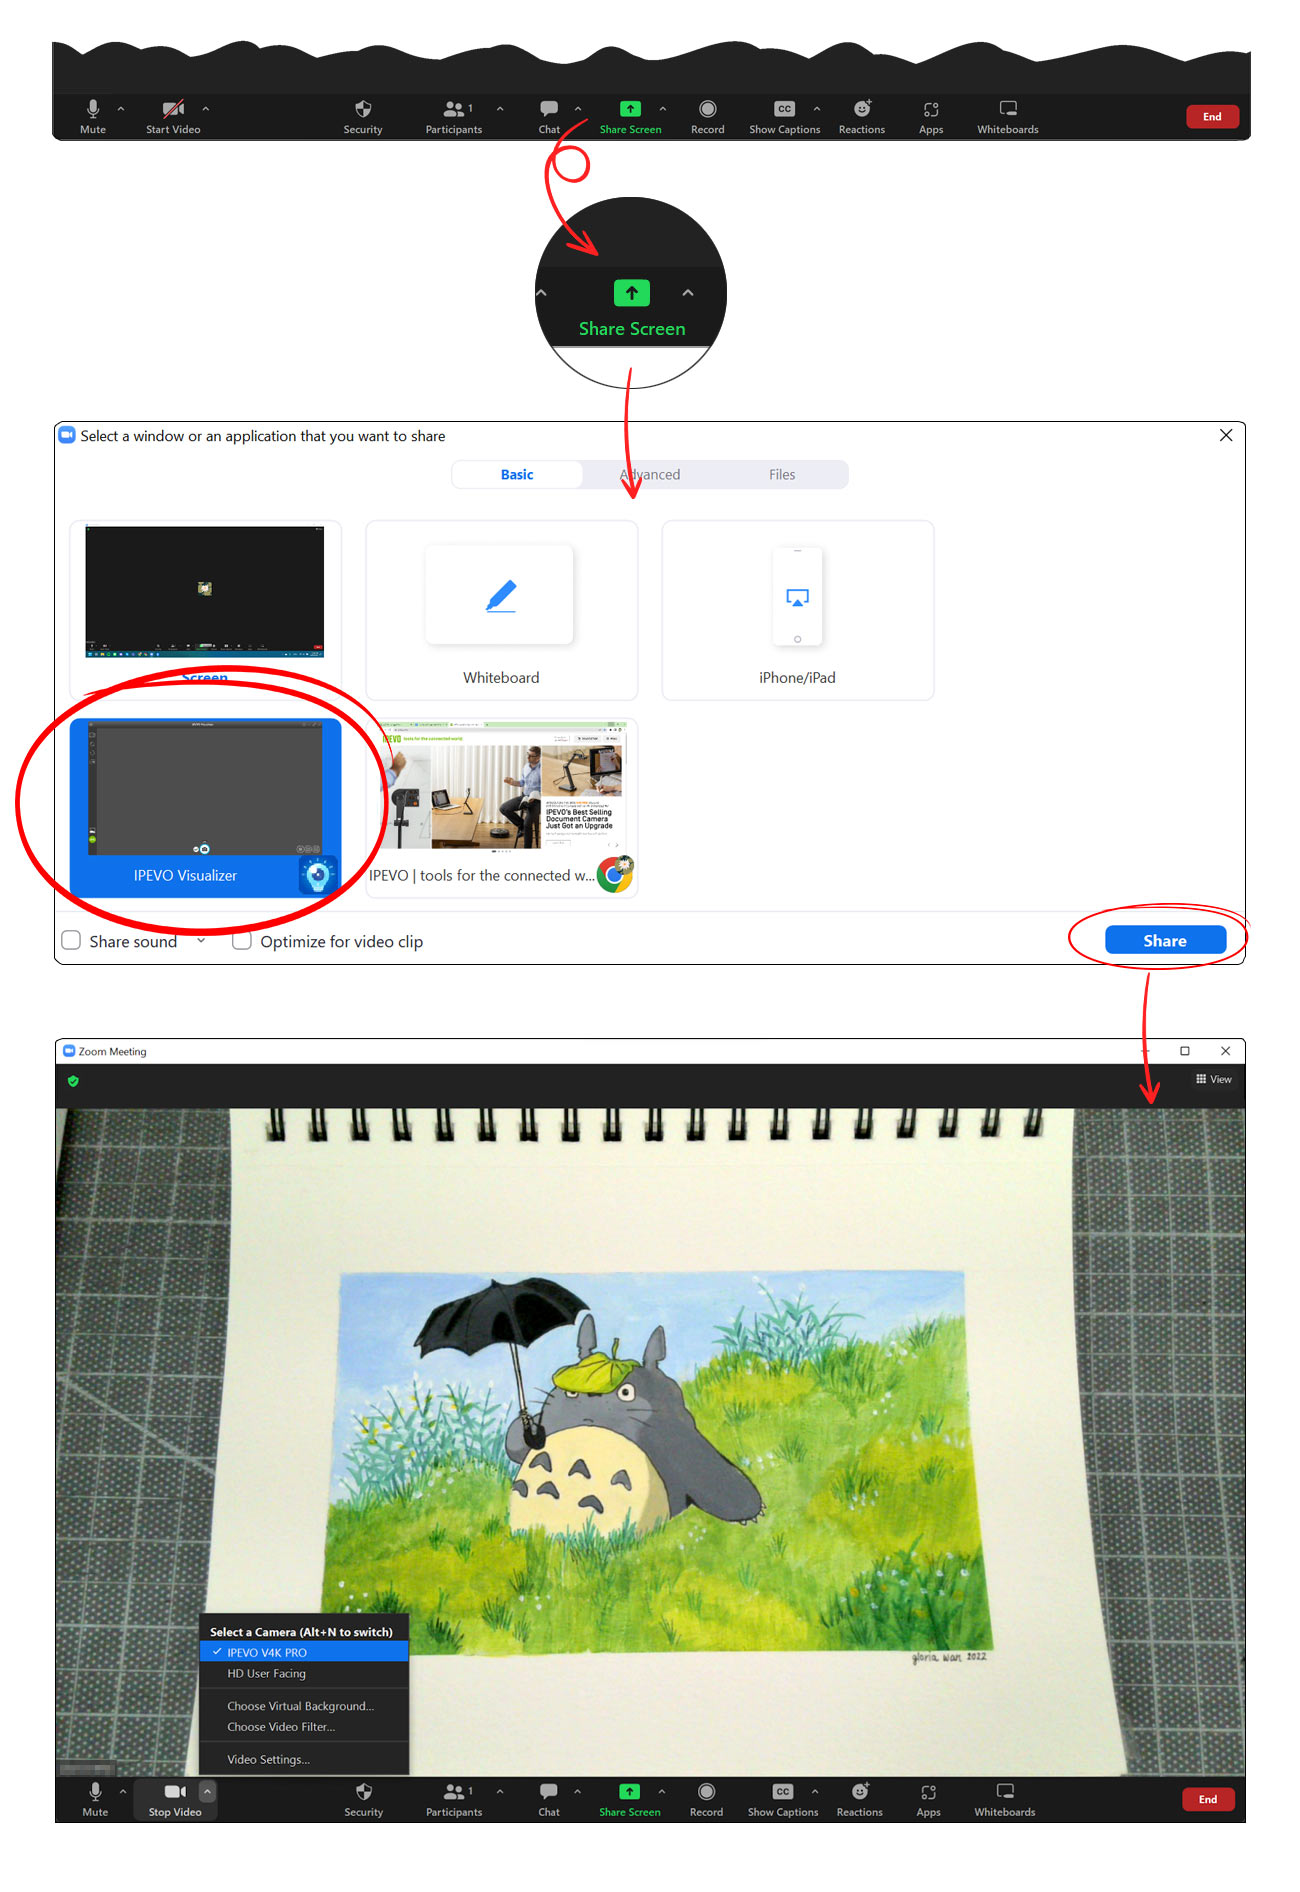
You can now use Visualizer with Zoom at the same time!
Video Instructions: https://youtu.be/QMjJkFyThrk
Using a second camera in Zoom: https://youtu.be/tS2U4E6VpMI